navX-MXP
Measuring motion/orientation, improving your autonomous and tele-operated software, and expanding roboRIO I/O
The navX-MXP Robotics Navigation Sensor provides an accurate, easy-to-use way to measure motion and 3D orientation of any object (for instance, your robot chassis or a robotic arm).
These capabilities enable you improve your autonomous and teleoperated programs by adding intelligent features including:
Driving in a straight line
Rotating automatically to a specific angle
Field-oriented drive
Automatic Balancing
Motion Detection
Collision Detection
navX-MXP is both a self-calibrating Inertial Measurement Unit (IMU) and an Attitude/Heading Reference System (AHRS).
navX-MXP is simple to install on a roboRIO, and includes roboRIO I/O expansion features.
Inertial Measurement Unit (IMU)
navX-MXP is an Inertial Measurement Unit (IMU), and includes 6 sensors which measure inertial motion: 3 accelerometers measuring acceleration (in units of Standard Gravity [g]) and 3 gyroscopes measuring Rotational Speed (in units of degrees per second).
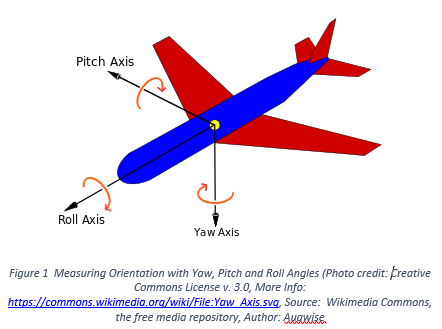
IMUs are typically used to measure aircraft orientation, but are also very useful for controlling a robot. IMUs measure rotation of an object around the Z-axis (known as “Yaw”), the X-axis (known as “Pitch”) and the Y-axis (known as “Roll”).
Pitch and Roll angles are absolute (tied to the earth’s surface); 0 degrees means “flat” with respect to the earth.
However, IMU Yaw angles are relative - not tied to any direction (like North on a Compass). Therefore, your robot application must decide where 0 degrees is. Usually, FRC robots treat the “head” of the field (the direction driver’s face) as 0 degrees.
For more information, please visit the navX-MXP Terminology page.
Digital Compass and Attitude/Heading Reference System (AHRS)
navX-MXP also includes 3 magnetometer sensors, which measure magnetic fields (in units of Tesla). By measuring the earth’s magnetic field, navX-MXP provides a digital compass which is a different way of measuring the Z (“Yaw”) axis.
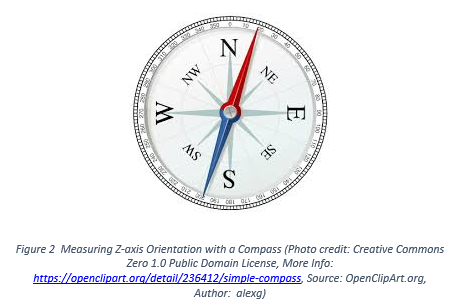
And by intelligently fusing the digital compass with the IMU can create a measurement of absolute 3D orientation.
Note
Earth’s magnetic field is actually very weak when compared to the magnetic field generated by a nearby motor; for this reason it can be difficult to get accurate digital compass readings on a FRC robot. For this reason, using the navX-MXP AHRS is an advanced feature best suited for teams who have the time to learn about how to calibrate the navX-MXP digital compass and also how to deal with magnetic disturbances.
roboRIO Hardware Installation
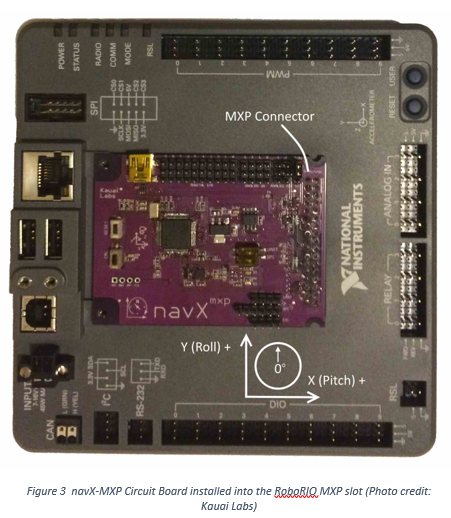
The navX-MXP can be easily connected to a National Instruments roboRIO MXP port. This only takes about 5 seconds and provides a stable, secure base for the onboard sensors that is aligned to the axes of your robot. Two screws are provided with navX-MXP to secure the circuit board to the roboRIO. More information may be found on the navX-MXP roboRIO installation page.
USB (optional, or to connect to your vision co-processor)
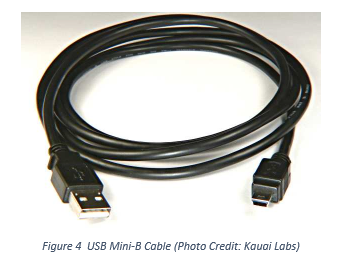
A secondary configuration possibility is to connect navX-MXP to a roboRIO or another computer via USB possible because data from navX-MXP flows simultaneously to the MXP connector and the USB port. Some teams have connected the navX-MXP USB port to a co-processor in order to integrate navX-MXP sensor measurements into their vision processing. To support access to USB-based navX-MXP data from a Linux-based co-processor, a Linux library was developed by Team 900 (Zebracorns) and is available here.
Note
As further described in the navX-MXP Best Practices, a USB cable connected to your roboRIO can also provide a secondary power supply in case of roboRIO brownout.
Enclosure
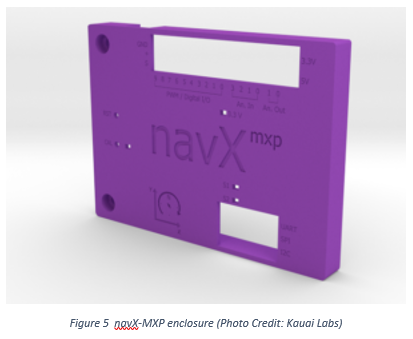
An enclosure is recommended to protect the navX-MXP circuit board from excessive handling, “swarf”,`electrostatic discharge (ESD) <https://en.wikipedia.org/wiki/Electrostatic_discharge>`__ and other elements that can potentially damage navX-MXP.
roboRIO Software Installation
To access navX-MXP from your roboRIO robot application, install the navX-MXP Libraries for roboRIO.
Using navX-MXP
Many example programs are available for navX-MXP in C++, Java and LabVIEW. Visit the navX-MXP Examples page for a description of each example and details on how to use it with your chosen programming language.
Learning More
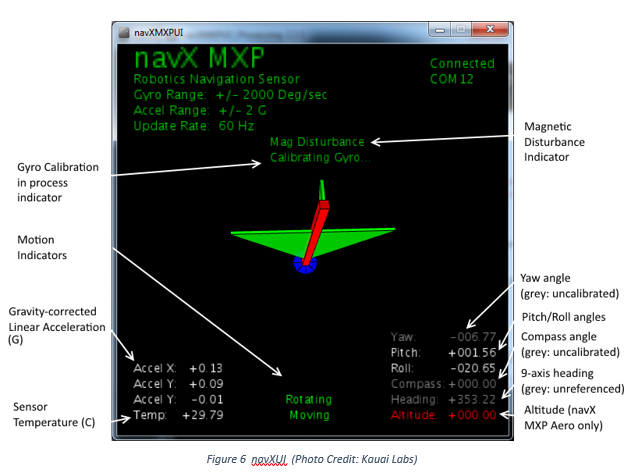
To learn more about how navX-MXP works, you can use navXUI, which runs on a Windows PC connected via USB to the navX-MXP and demonstrates all of the navX-MXP features. navXUI also provides a way to save navX-MXP data to a file so you can analyze it. navXUI can even run simultaneously with your roboRIO robot application.
Best Practices
If you want to get the most out of your navX-MXP and achieve results similar to those of the top FRC teams, the navX-MXP Best Practices is just for you. These guidelines will help you avoid common pitfalls and achieve the highest possible accuracy.
Getting Help
If you have trouble with navX-MXP, please visit the navX-MXP support page; you can join the navX-MXP newsgroup or contact technical support for help.